|
| Our Field Ecology Center published more than
180 methodical materials for nature studies. Some of them are in English: |
|
|
|
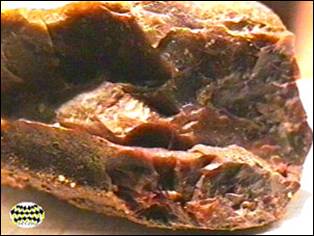
Studying Minerals and Rocks in Your Area
© Alexsander S. Bogolyubov,
Michael V. Kravchenko, Russia, 1999
© Michael J. Brody, USA,
2003
 This manual contains a description of
procedures for collecting mineral and rock samples in your area as well as a brief
theoretical course in mineralogy. The manual also contains descriptions and short
characteristics of rock classes, simple identifying keys and recommendations for the
presentation of the rock and mineral collection. This manual contains a description of
procedures for collecting mineral and rock samples in your area as well as a brief
theoretical course in mineralogy. The manual also contains descriptions and short
characteristics of rock classes, simple identifying keys and recommendations for the
presentation of the rock and mineral collection.
This field study has instructional video
featuring real students conducting the ecological field techniques in nature. Each video
illustrates the primary instructional outcomes and the major steps in accomplishing the
task including reporting the results.
Introduction
While studying different ecological objects that are connected to rocks (as
rocks serve as substrate for many organisms), it is necessary to know the mineral
(as well as approximate chemical) composition of these rocks. As pure minerals are rarely
found in nature (not as a component of rock composition), so the focus of this manual is
paid to rocks as the main objects serving as habitats of living organisms. The manual is
composed in such a way to be used to identify minerals and rocks under field conditions.
Sites and techniques for sampling
This lesson can be carried out almost anywhere: in the mountains and on the plains.
Many different rock and mineral types can be found almost everywhere, even on an “old”
plain. There is no problem with a mineral search in mountains; however classification and
identification of rock samples will be much more laborious.
Let us describe a selection of search sites for minerals and rocks in the plains
in more detail. First of all, students should look for samples in soil profiles. Lower
soil horizons are richer in samples at the place where the soil turns into parent rock
(mother rock).
Rock and mineral samples can always be found in beds of small streams; they are
usually rocks washed out of soils and mother rock by streambed currents in the course
forming beds (i.e. they are “local” deposits). The farther they are found from a big
river, the more “local” these deposits are and, correspondingly, the closer they are
to the river the higher the chance that they have been brought by the river from far away.
There is another typical place for rock sampling: riverbeds. Look for undermined
bank sections, where “stones” can always be found. They are generally alluvial
(modern fluvial) or fluvioglacial (ice-borne) sediments. It is quite
difficult to tell the difference between them; fluvioglacial sediments are usually located
underneath alluvial, but sometimes it is quite the contrary.
One more possible place is the outcrops of terraces. The farther they are
located from the river, the older the deposits are. It is also possible to look for rocks
and minerals in other, sometimes unexpected places on flat ground, including construction
sites, dump piles left after a well is built, as well as in sand pits (quarries) where
sand and broken stone is quarried for building roads. Ideal places among technogeneous
objects are quarries and open-cast mineral mines.
There are a number of rules for collecting rock samples regardless of where they are
collected.
First, two or three samples of the same kind (at least according to appearance)
should be taken from each sampling place. The samples can turn out to be different on
closer examination.
Second, do not take boulders of their natural size; they are too heavy to carry. It
is a good idea to take a hammer with you and break stones into pieces directly at the
site, so they can be identified and placed in the collection (size usually ranges from the
size of a walnut to a fist).
Third, each collected sample should be wrapped in separate packing, such as paper
or plastic bags, or in the simplest case wrapped in a sheet of paper.
Fourth, a label should be filled in for each sample. The label contains detailed
description of the sampling site: its administrative and local position, layer (soil
horizon), where the sample has been taken from (depth, thickness of the horizon, and main
composition of the horizon or layer), and initial size of the sample (if it has been
broken). It is also necessary to write down the date and author of the sample collection.
If samples are collected in bags, then labels are written down on pieces of paper,
which are put into the bag. If samples are wrapped in paper – label data is written down
on the wrapping paper. Minerals and rocks can be identified in the field, but it is more
convenient to identify them in the lab.
When students return to the lab, they should sort out all the samples. A large table
will work best. Initial sorting is conducted according to sampling sites. Samples that are
common for different places (according to their appearance) are revealed in each sampling
site collection. Common minerals and rocks usually make up from fifty to...
This was only the first page from the manual and its full version you can see in the
Ecological Field Studies Techniques Video 4CD Set:
It is possible to purchase the complete set of 40 seasonal Ecological Field
Studies Techniques Video (in mpg format) in an attractive 4 compact disk set.
These compact disks are compatible with Mac and PC computers.
The videos are suitable for individual student or whole class instruction. To purchase the complete 4CD set
write to ecosystema1994@yandex.ru in a free form.

Ecological Field Studies Demo Disk:
We also have a free and interesting demonstration disk that explains our ecological field studies approach.
The demo disk has short excerpts from all the seasonal field study videos as well as sample text from all the teacher manuals.
The disk has an entertaining automatic walk through which describes the field study approach and explains how field studies meet education standards.
You can also download the Demo Disc from ecosystema.ru/eng/eftm/CD_Demo.iso.
This is a virtual hybrid (for PC and Mac computers) CD-ROM image (one 563 Mb file "CD_Demo.iso").
You can write this image to the CD and use it in your computer in ordinary way.
You also can use emulator software of virtual CD-ROM drive to play the disk directly from your hard disk.

|


